Installation Guide
This section provides information about the initial installation and setup
for the Models 100 and 200.
The initial installation of the Model 100 consists of the following
steps:
- Installing optional features (see Installing optional features).
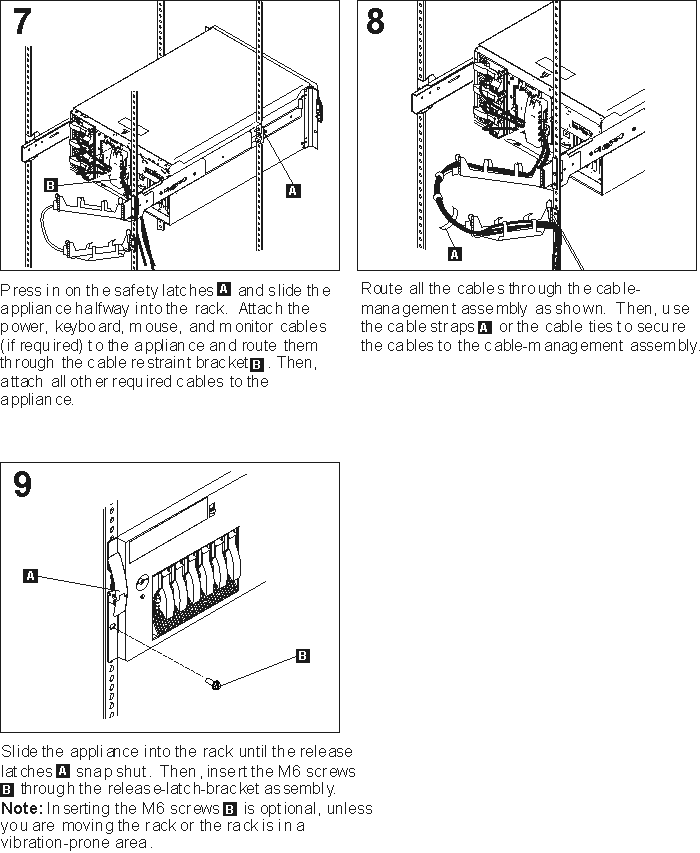
- Connecting the power cords and communication cables (see Cabling).
- Starting the appliance and verifying that the power-on diagnostics
completed successfully (see Starting the appliance).
- Performing the initial configuration (see Performing initial configuration).
The initial installation of a Model 200 consists of the following
steps:
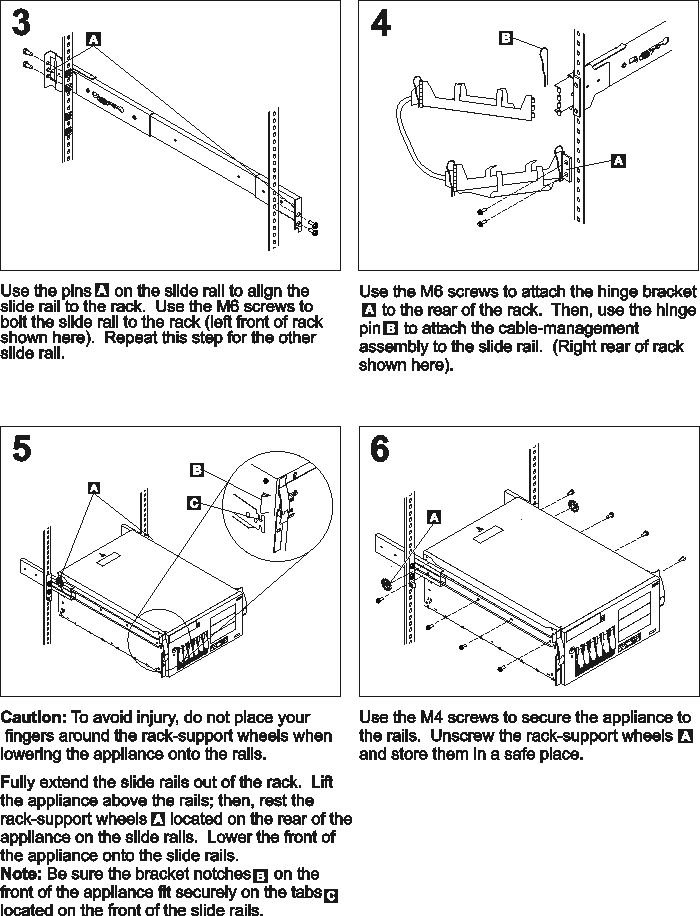
- Installing in a rack (see Setting up the Model 200 in a rack).
- Installing optional features (see Installing optional features and Installing a storage unit).
- Connecting the power cords and communication cables (see Cabling).
- Starting the appliance and verifying that the power-on diagnostics
completed successfully (see Starting the appliance).
- Performing the initial configuration (see Performing initial configuration).
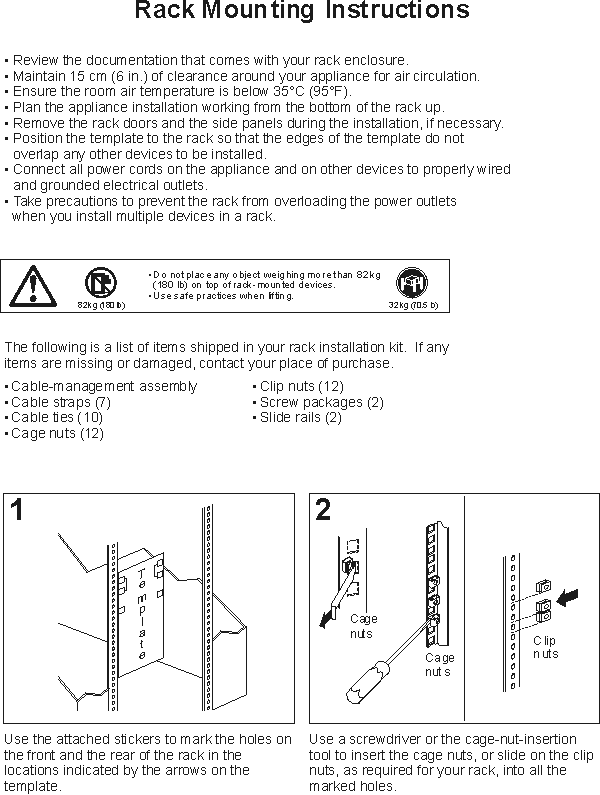
For Model 200, you must first install the appliance in a rack, using the
rack-mounting kit provided.
The following reduced-size illustration of the front and the back of the
rack mounting template shows where to place the clip nuts or cage nuts when
installing your appliance in a rack.
Figure 1. Front and back of the rack mounting template
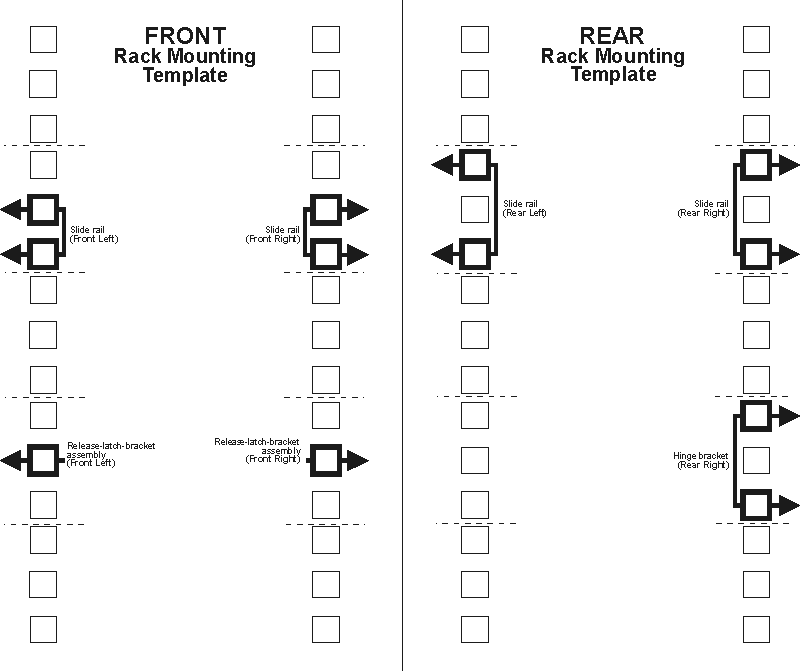
Figure 2. Rack mounting instructions
[ Top of Page | Previous Page | Next Page | Table of Contents | Index ]