Installation and User's Guide
This section contains instructions for switching the storage unit on and
off under normal and emergency circumstances.
If you are switching on the storage unit after an emergency shutdown or
power outage, refer to "Switching on the storage unit after an emergency".
Use this procedure to
switch on the power for the initial startup of the storage unit.
- Verify that:
- All cables are properly attached.
- Both power cords are plugged into the back of the storage unit and into
properly grounded electrical outlets.
- All hard disk drives are locked securely in place.
- All switches are set correctly: the internal option switches 1
through 4, external option switches 1 through 5, and the unit ID switch on the
storage unit. See "Setting the interface options and ID settings", for more information.
- Check the system documentation for all the hardware devices you intend to
switch on and determine the proper power-on sequence.
- Note:
- Be sure to switch on the storage unit before or at the same time as you
switch on the server.
- Switch on each device, based on this power-on sequence.
- Switch on both power supplies on the back of the unit.
The storage unit might take a few seconds to switch on. During this
time, you might see the fault (amber) and the power (green) LEDs on the
storage unit turn on and off intermittently. When the power-on sequence
is complete, only the power (green) LEDs on the front and back should remain
on. If one or more fault (amber) LEDs remain lit, refer to "Troubleshooting".
Attention: If you have data stored on the drives, label the
drives before you remove them. Then, when you replace the drives,
install each one in the same drive bay from which you removed it.
Failure to do so will result in a loss of data.
Attention: Except in an emergency situation, never turn off
the power if any fault LEDs are lit on the storage unit. Correct the
fault before you attempt to turn off the power, using the proper
troubleshooting or servicing procedure. This will ensure that the
storage unit will turn on correctly later. Refer to "Troubleshooting".
| Statement 5
|

|
|
|
|
|
|
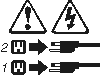
Caution:
The power control button on the device and the power supply do not turn off
the electrical current supplied to the device. The device also might
have more than one power cord. To remove all electrical current from
the device, ensure that all power cords are disconnected from the power
source.
|
|
|
|
|
The storage unit is designed to run continuously, 24 hours a day.
Turn off the power only when at least one of the following is true:
Use the following procedure to turn off the storage unit:
- Power down the server attached to the storage unit.
- Make sure that all amber fault LEDs are off. If any fault LEDs are
lit (drives, power supplies, or ESM boards), correct the problem before you
turn off the power. For guidance, refer to "Troubleshooting".
- Turn off both power supplies.
Attention: Emergency situations might include fire, flood,
extreme weather conditions, or other hazardous circumstances. If a
power outage or emergency situation occurs, always turn off all power switches
on all computing equipment. This will help safeguard your equipment
from potential damage due to electrical surges when power is restored.
If the storage unit loses power unexpectedly, it might be due to a hardware
failure in the power system or midplane. Refer to "Troubleshooting".
Use the following procedure to
turn off the storage unit during an emergency situation:
- Power down the server attached to the storage unit.
- If you have time, stop all activity and check the LEDs (front and
back). Make note of any fault LEDs that are lit so that you can correct
the problem when you switch on the power again.
- Turn off all power supplies; then, unplug the power cables from the
storage unit.
Use the following procedure to
restart the storage unit if you turned off the power supplies during an
emergency shutdown, or if a power failure or a power outage occurred:
- After the emergency situation is over or power is restored, check the
storage unit for damage. If there is no visible damage, continue with
Step 2; otherwise, have your unit serviced.
- After you have checked for damage, plug in the expansion-unit power cables
and switch on the power.
- Check the system documentation for the hardware devices you intend to
switch on, and determine the proper power-on sequence.
- Note:
- Be sure to switch on the storage unit before or at the same time you switch
on the system unit.
- Switch on each device, based on the power-on sequence.
- Switch on both power supplies on the back of the storage unit.
- Only the power (green) LEDs on the front and back should be on. If
one or more of the fault (amber) LEDs are on, refer to "Troubleshooting", for instructions.
- Use your installed software application as appropriate to check the status
of the storage unit.
[ Top of Page | Previous Page | Next Page | Table of Contents | Index ]